WebLogic Integration Guide for Altibase#
Overview#
This is a technical document for integrating with Altibase and WebLogic. It also covers running a simple web application that works with Altibase on the assumption that WebLogic is installed.
This document is based on WebLogic 12.1.3.0 on the Windows platform, and all contents may differ depending on the version. For basic environments such as WebLogic installation and domain creation, refer to Oracle's documentation and management console help provided when installing WebLogic (Administration Console).
In addition to this document, the documents to be referenced during development are as follows.
- JAVA Development Guide
- JBoss Integration Guide for Altibase
- TOMCAT Integration Guide for Altibase
- WebSphere Integration Guide for Altibase
- Spring Integration Guide for Altibase
- Hibernate Integration Guide for Altibase
- iBATIS Integration Guide for Altibase
Info
For errors and improvements related to this document, please contact the technical support portal or technical support center.
- Technical support portal: http://support.altibase.com/en
- Technical support center: +82-2-2082-1114
Info
This document is provided for informational purposes only and is subject to change without prior notice. It may contain errors, and Altibase makes no express or implied warranties of any kind, including but not limited to warranties of merchantability or fitness for a particular purpose.
The development, release, and timing of any features or functionality described for Altibase products in this document are at the sole discretion of Altibase.
Altibase may hold patents, trademarks, copyrights, or other intellectual property rights related to the contents of this document.
Prerequisites#
WebLogic Version#
We recommend to use the latest version, and at least WebLogic 8.1.6.0 or later is recommended.
If a different version of Altibase is integrated at a lower version than this, the JDBC driver integration may not work properly, which may cause the operation of the WebLogic server instance to fail or hang.
JDBC Specification#
The Altibase 5 JDBC driver was built in JDK 1.4 based on the JDBC specification 3.0 (JRE 1.4 or 1.5), and returns "Not supported" or an error in case of non-spec support.
Therefore, an application program written on the basis of JDBC specification 4.0 (JRE 1.6 or later) may cause problems due to unsupported specification, so it is necessary to comply with JDBC 3.0 specification from the development stage.
WebLogic Setup#
A brief procedure to create a domain after downloading and installing WebLogic will be described using WebLogic 12.1.3.0 on the Windows platform as an example.
Download#
As BEA Systems, which developed WebLogic in April 2008, was acquired by Oracle, WebLogic can be downloaded from the Oracle middleware product download page from version 9 or later.
http://www.oracle.com/technetwork/middleware/downloads/index.html
After accepting the license agreement from the relevant web page, download the most recently released WebLogic for the operating system platform.

Installation#
When the downloaded file is running, the WebLogic automatic installer is running.
Install WebLogic in the following procedure.
-
Select Next on the start screen and specify the path where WebLogic and related middleware products will be installed.


-
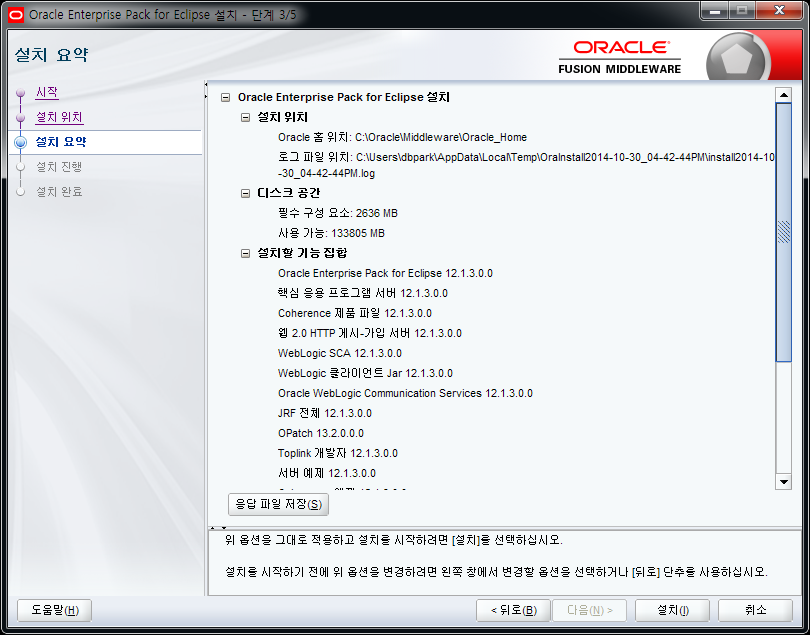
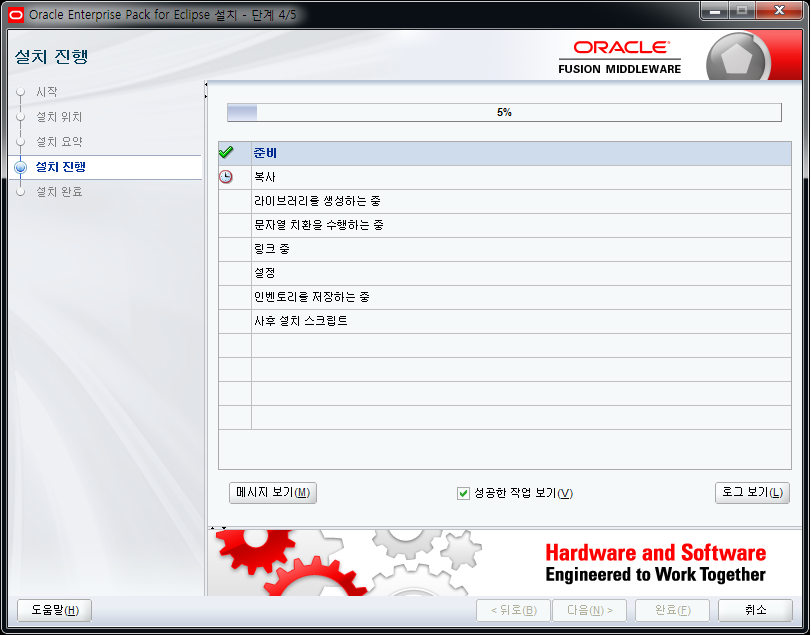
Check and Install the installation summary
(The installation path of the WebLogic specified here is later identified by the environment variable WL_Home.)
-
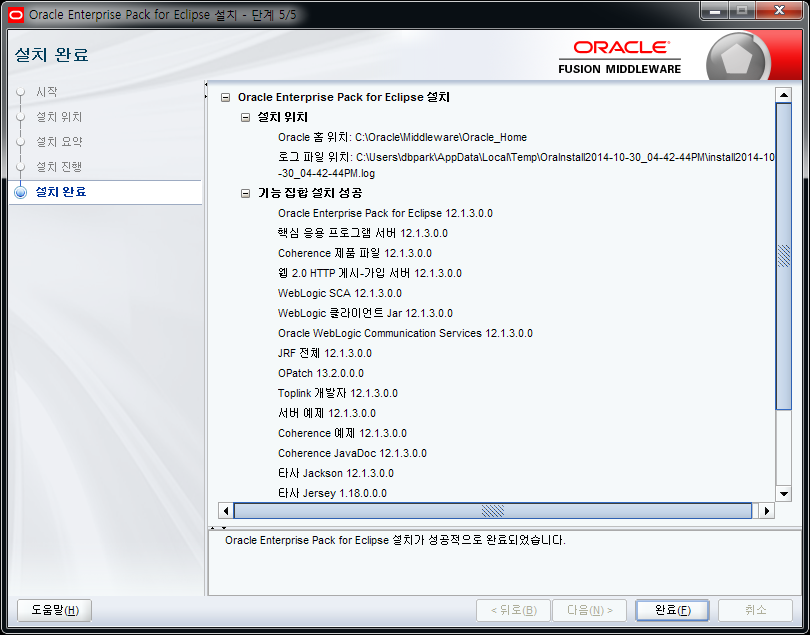
Confirm whether the installation is completed
Creating Domain#
The domain can be created by using the Configuration Wizard.
Install WebLogic in the following procedure.
-
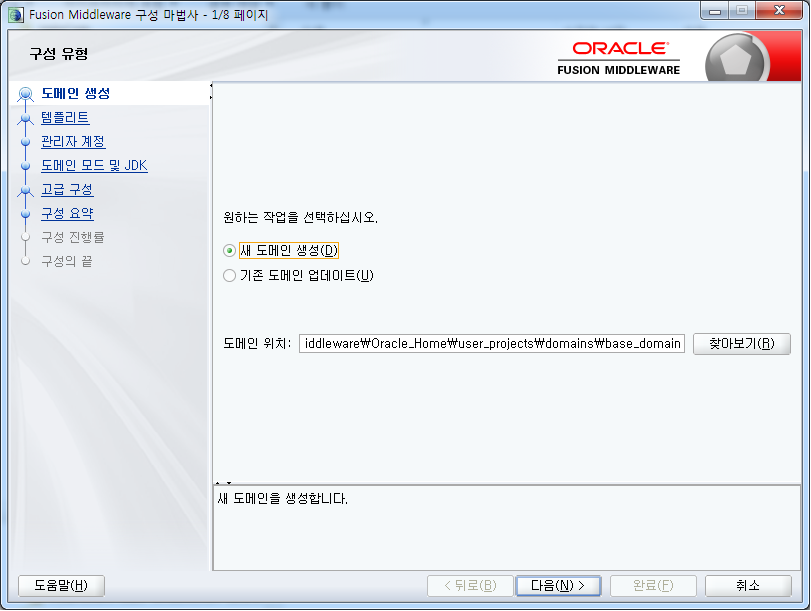
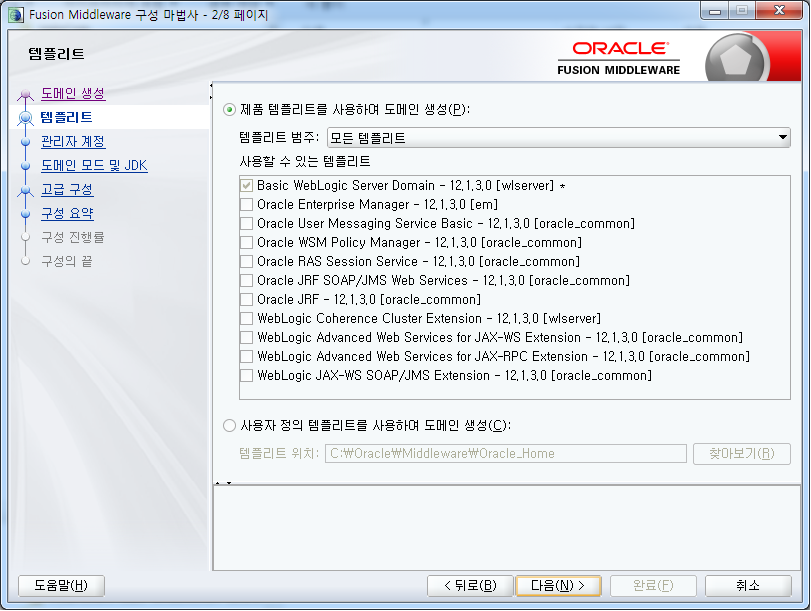
Run the installation wizard to create a new domain. (The user can set the domain location.)
-
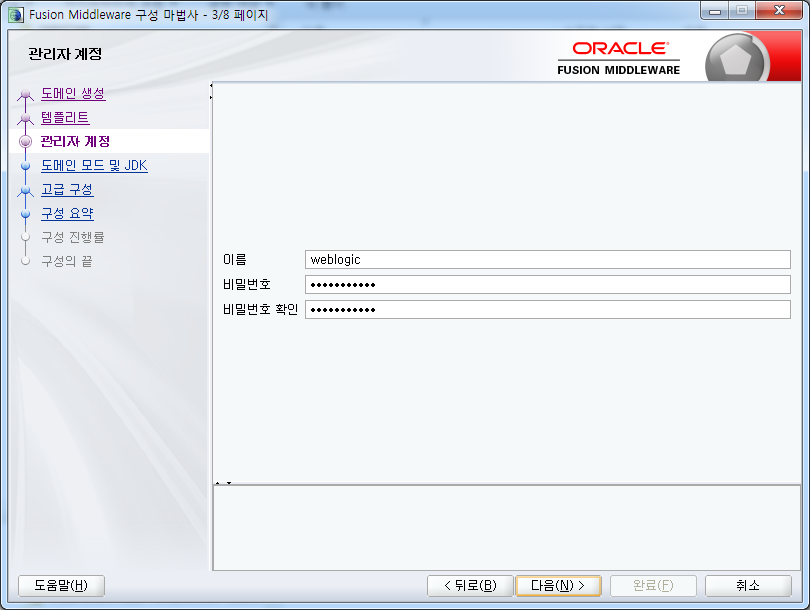
Enter the user name and password for the management server.
(The installation path of the domain specified here is later identified by the environment variable DOMAIN_HOME.)
-
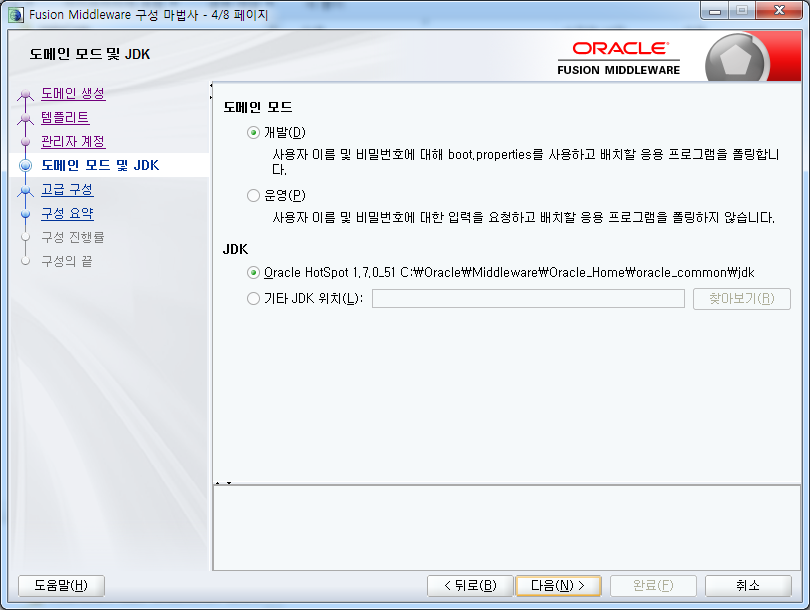
Set the start mode and JDK of the domain management server.
-
Start Mode
For testing purposes, select "Development Mode".
In the development mode, web applications can be automatically deployed and changed through $DOMAIN_HOME/autodeploy for testing.
-
JDK
Selecting the start mode automatically selects the appropriate JDK, so there is no need to select it unless it is a special case.
-
-
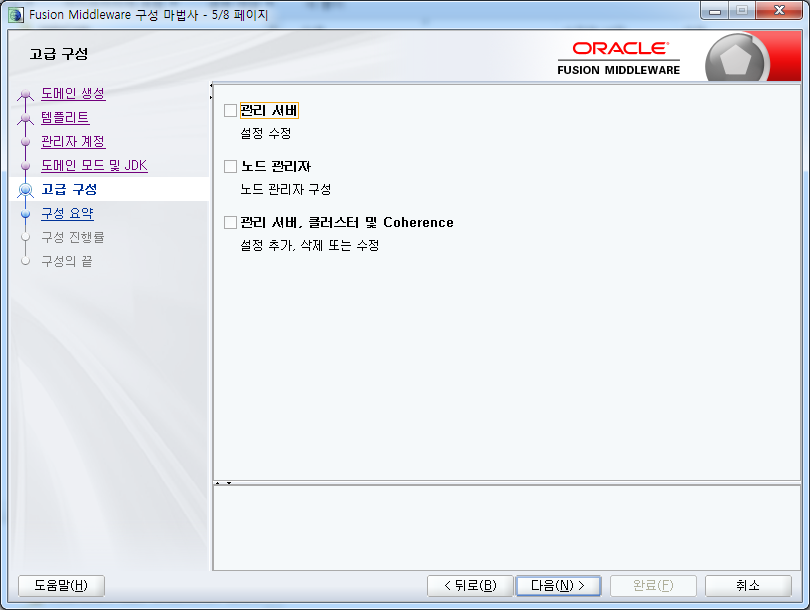
If there is a specific change the user wants to make, such as receiving port of the management server, select the relevant item, and change it. If not, skip (NEXT).
For reference, the management server uses port 7001 by default.
-
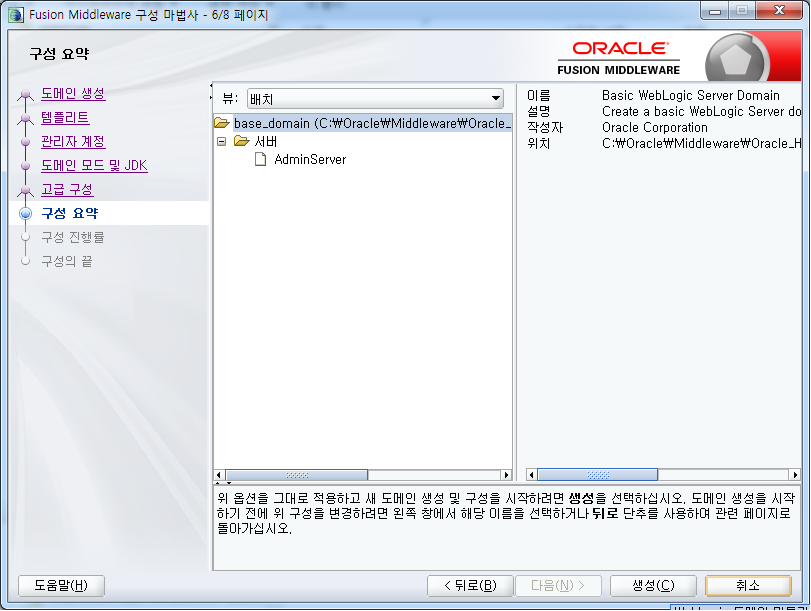
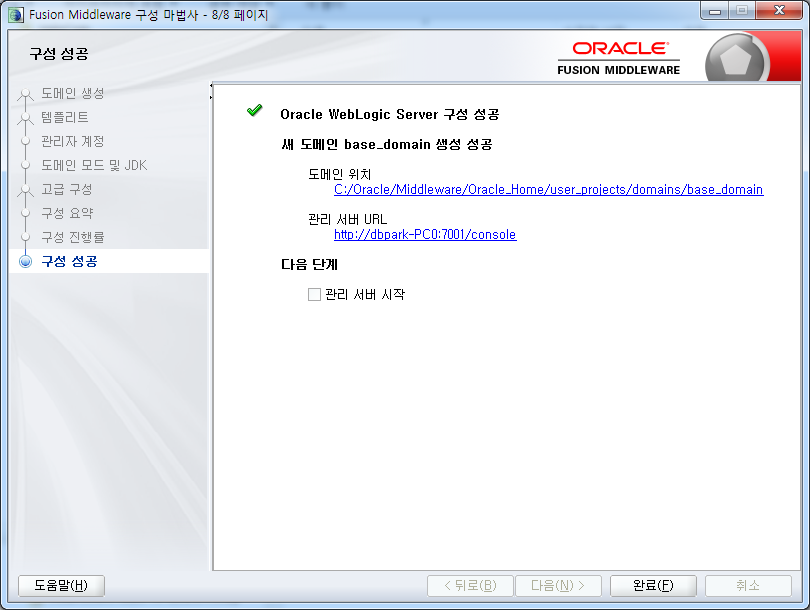
When domain creation is complete, check the "Start Management Server" option and select Done.
-
Installation Complete
Starting and Shutdown the WebLogic Server Instance#
Among the various ways to start and shutdown the WebLogic server instance, the following describes how to start and stop the script (script or batch) file in $DOMAIN_HOME/bin.
The script file has the separate start/stop script files for each management server and each managed server for each domain.
- Management Server - startWebLogic.cmd / stopWebLogic.cmd
- Managed Server - startManagedWebLogic.cmd / stopManagedWebLogic.cmd
Start#
Run startWebLogic.cmd to start the management server of the domain. The following is an example of the message format when the operation is completed normally.
$ startWebLogic.cmd
.
JAVA Memory arguments: -Xms256m -Xmx512m -XX:CompileThreshold=8000 -XX:PermSize=128m  -XX:MaxPermSize=256m
.
***************************************************
  To start WebLogic Server, use a username and
  password assigned to an admin-level user.  For
  server administration, use the WebLogic Server
  console at http:\\hostname:port\console
***************************************************
... omitted ...

<2014. 10. 30 오후 4시 27분 13초 KST> <Notice> <WebLogicServer> <BEA-000331> <Started the WebLogic Server Administration
 Server "myserver" for domain "mydomain" running in development mode.>
<2014. 10. 30 오후 4시 27분 13초 KST> <Notice> <WebLogicServer> <BEA-000360> <The server started in RUNNING mode.>
<2014. 10. 30 오후 4시 27분 13초 KST> <Notice> <WebLogicServer> <BEA-000365> <Server state changed to RUNNING.>
Shutdown#
Run stopWebLogic.cmd to shutdown the management server of the domain. The following is an example of the message format when the shutdown is completed normally.
$ stopWebLogic.cmd
Stopping Weblogic Server...
... omitted ...
Connecting to t3://IBM-1DA5AF93847:7001 with userid weblogic ...
Successfully connected to Admin Server 'AdminServer' that belongs to domain 'mydomain'.
... omitted ...
Shutting down the server AdminServer with force=false while connected to AdminServer ...
Disconnected from weblogic server: AdminServer
Exiting WebLogic Scripting Tool.
Done
Stopping Derby Server...
In case of a shutdown, it is possible to guarantee the normal termination only by the execution result of the shutdown script file.
If the related process still exists despite the normal shutdown in the message, the log of the WebLogic server instance should be checked and corrected.
JDBC Driver Settings#
To create a JDBC data source, the relevant JDBC driver must be set in WebLogic. This section describes overall information about JDBC Driver settings.
How to get the Altibase JDBC Driver#
The Altibase JDBC driver is provided as a single file called Altibase.jar.
It is provided with the Altibase Server package by default, so it can be obtained in the $ALTIBASE_HOME/lib directory of the operating system account where Altibase is installed.
Altibase.jar, as well as Altibase5.jar files, exist from the Altibase 5 version. Altibase5.jar is used to link Altibase 5 and lower versions together.
Therefore, in a normal situation where only one Altibase server or multiple Altibase servers of the same version are linked, the file $ALTIBASE_HOME/lib/Altibase.jar can be used.
The latest Altibase JDBC driver is included when installing the client package after accessing the site. http://support.altibase.com.
How to check the Altibase JDBC Driver Version#
In order to determine whether the Altibase Server and the Altibase JDBC Driver are compatible, the version of the Altibase Server and Altibase JDBC Driver must be compared to check whether the CM (Communication) protocol matches.
The method to check the version of the Altibase server is as follows.
$ altibase -v
version 6.3.1.2.7 X86_64_LINUX_redhat_Enterprise_ES4-64bit-6.3.1.2.7-release-GCC3.4.6 (x86_64-unknown-linux-gnu) Oct  8 2014 09:16:24, binary db version 6.2.1, meta version 6.3.1, cm protocol version 7.1.1, replication protocol version 7.4.1
The method to check the version of the Altibase JDBC Driver is as follows.
$ java -jar Altibase.jar
JDBC Driver Info : Altibase Ver = 6.3.1.2.6 for JavaVM v1.4, CMP:7.1.1, Oct  6 2014 13:54:56
Here, if the "cm protocol version" of the Altibase server matches the "CMP" of the Altibase JDBC driver, compatibility is possible.
Generally, the Altibase JDBC driver file included in the Altibase server package is used for compatibility, but it is recommended to use the latest compatible Altibase JDBC driver file whenever possible.
How to set the JDBC Driver to be used in WebLogic#
To use a specific JDBC driver in WebLogic, the relevant files must be added to the CLASSPATH of the domain management server.
It can be set up in two ways. It is irrelevant to select either method, but after setting, the user must restart the management server of the domain.
For reference, all the examples are for setting Altibase 5 and Altibase of different versions at the same time. When integrating Altibase of the same version, only one JDBC driver needs to be set.
-
The JDBC driver-related files are located in $DOMAIN_HOME/lib.
After placing JDBC driver-related files in $DOMAIN_HOME/lib, the default library path of each domain, when the management server of the domain is started, the files are automatically added to the CLASSPATH with the following message.
... <2010. 12. 14 오후 4시 48분 24초 KST> <Notice> <WebLogicServer> <BEA-000395> <Following extensions directory contents added to the end_of_the_classpath:C:\Oracle\Middleware\user_projects\domains\mydomain\lib\Altibase.jar;C:\Oracle\Middleware\user_projects\domains\mydomain\lib\Altibase5.jar> ... -
Add JDBC driver-related files directly to CLASSPATH of startWebLogic.cmd file.
Open the startWebLogic.cmd file which is the management server of each domain, and add the JDBC driver-related file directly to the CLASSPATH item and restart it.
...
set CLASSPATH=%SAVE_CLASSPATH%;C:\WebLogic_lib\Altibase5.jar;C:\WebLogic_lib\Altibase.jar
...
Altibase and WebLogic Integration#
This chapter describes the integration procedure for creating a JDBC data source for Altibase to be integrated using the domain management console and then running a simple web application using the JDBC data source.
Creating JDBC Data Source#
This is the procedure for creating a JDBC data source for Altibase and setting up the connection pool of the JDBC data source.
For reference, in the lower version, the connection pool was created first, and then the JDBC data source to use the connection pool was created. However, in the higher version, when the JDBC data source is created, the connection pool is automatically created.
Basically, the JDBC driver setting for the JDBC data source to be created must be preceded by referring to HOW to Set the JDBC Driver to be used in WebLogic.
Creating JDBC Data Source#
Create a JDBC data source "altibase" for Altibase 5 installed locally.
-
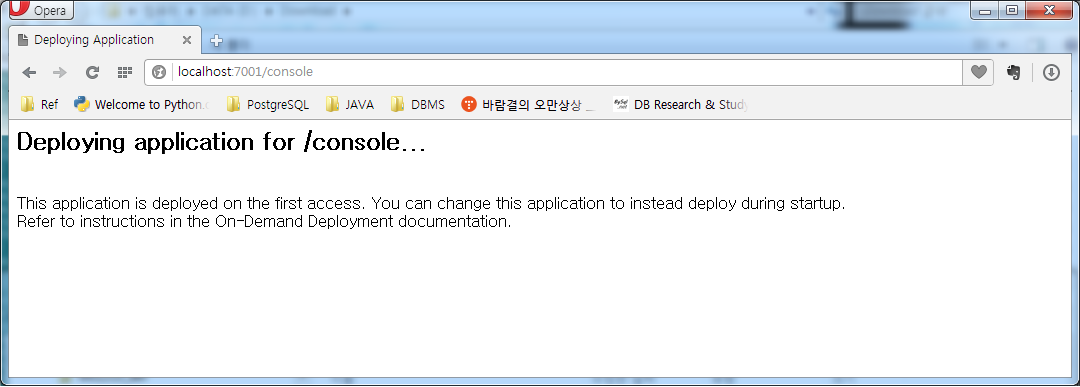
Connect to the management console provided by the domain management server.
-
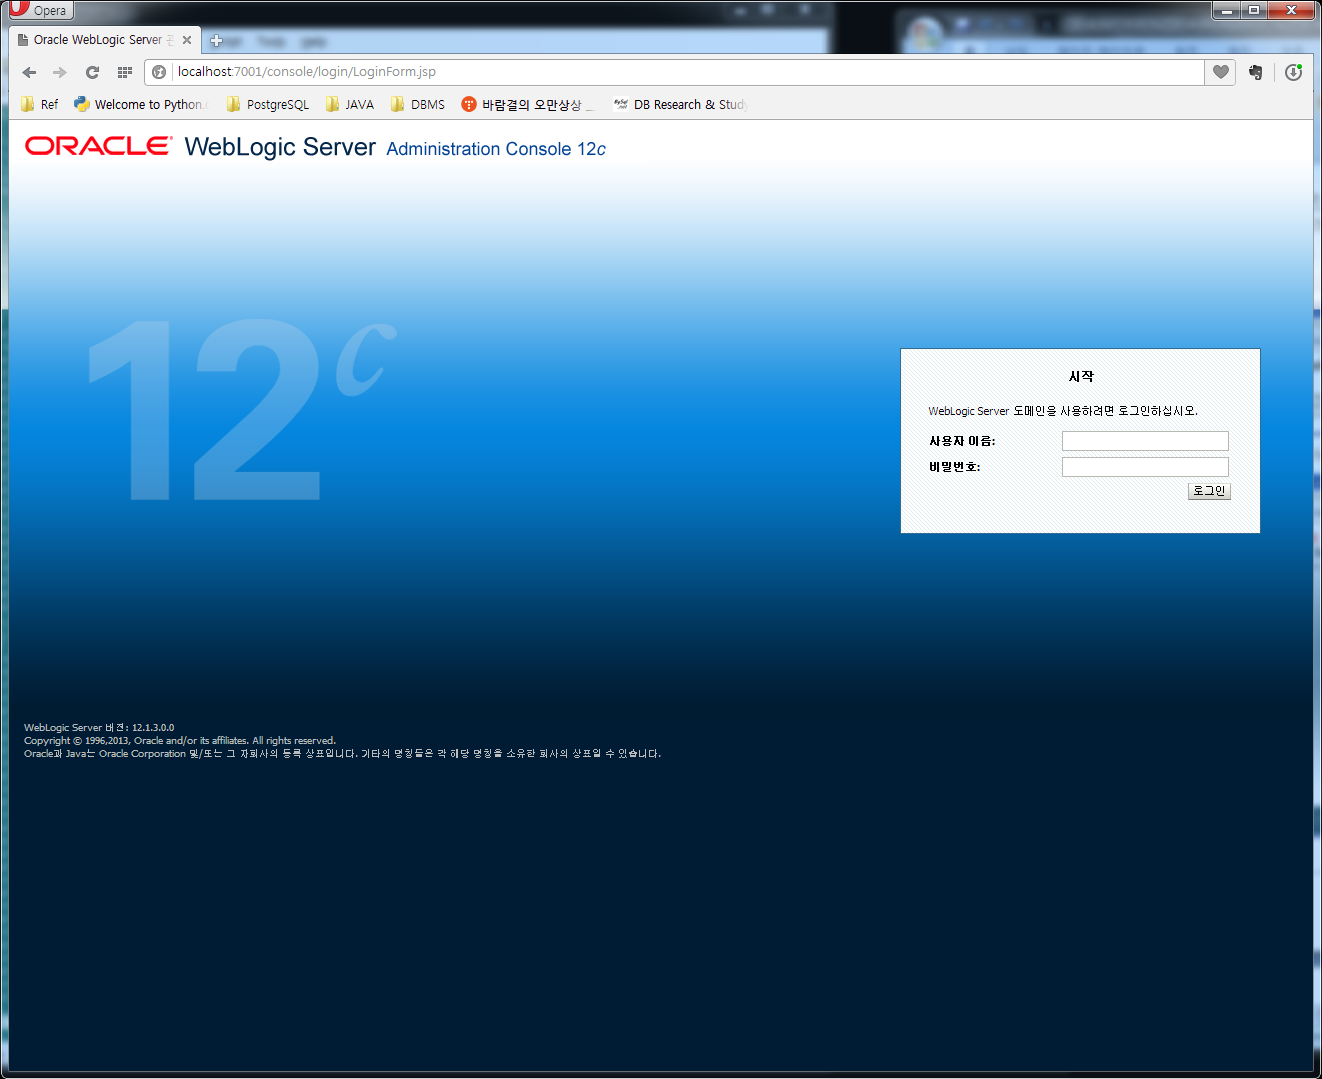
Log in by entering the user name and password of the management server.
-
Select the "Data Source" item on the main page of the management console.
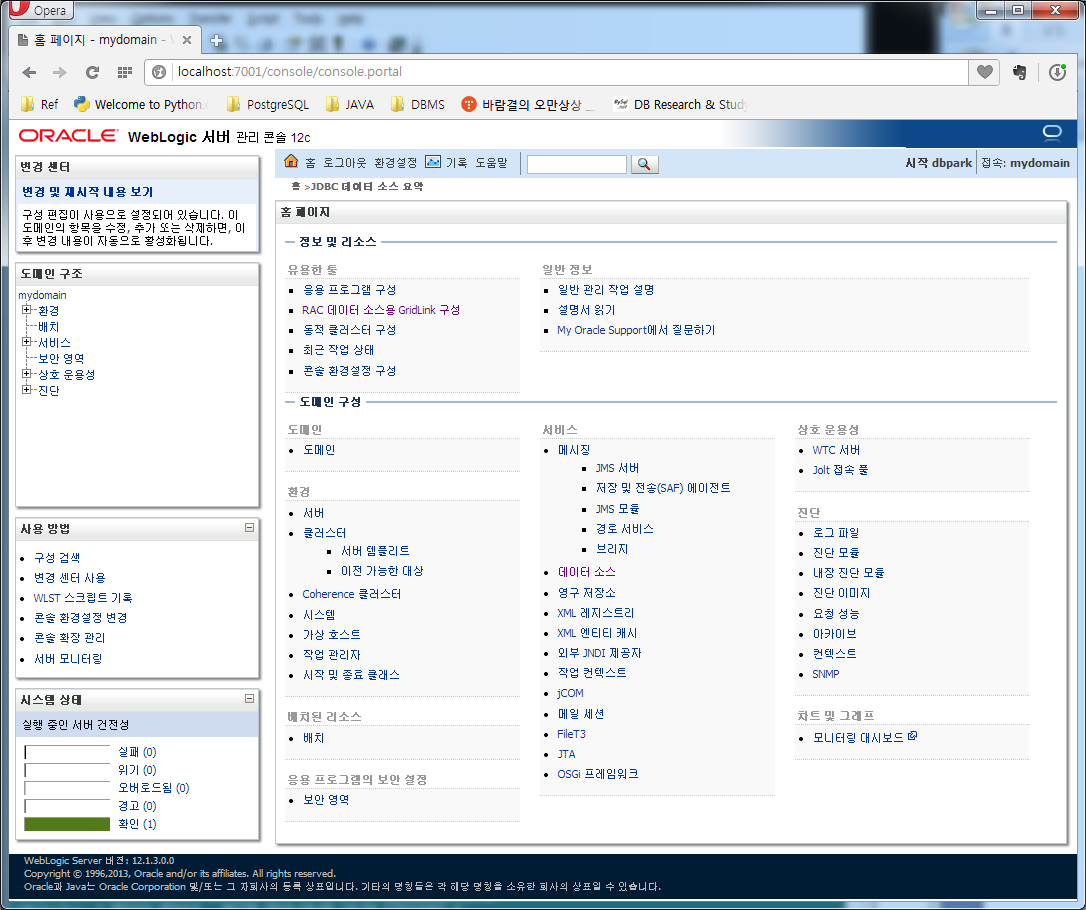
-
Select a general data source from [DOCKI: New].
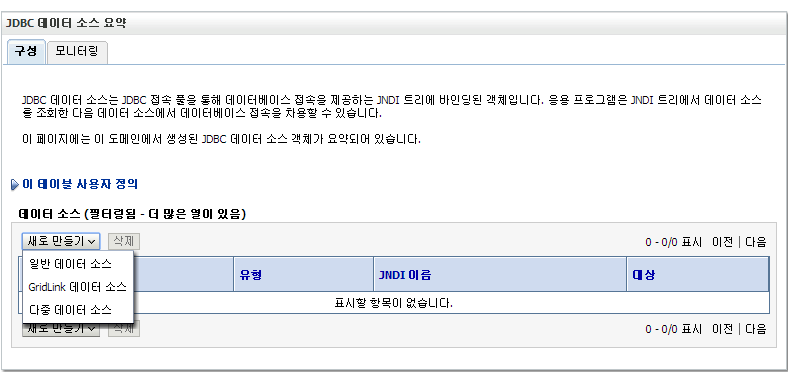
-
After entering the JDBC data source properties, go to the next step.
- JDBC data source, JNDI name should be the same in general.
- Select the data type [DOCKI: Other].
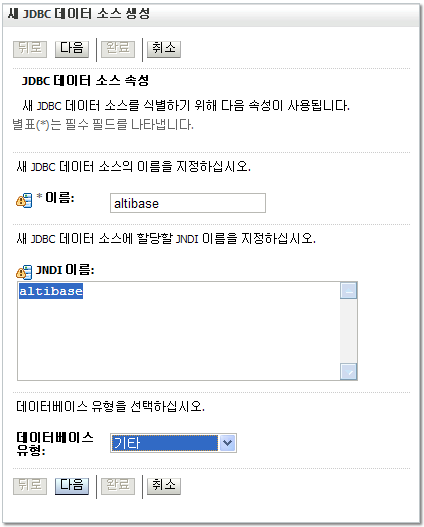
-
Check database type (other)
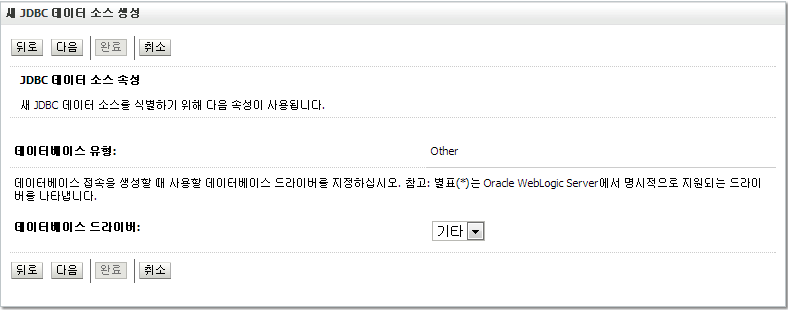
-
Skip the subsequent “JDBC data source attribute” step and go to the next step.
-
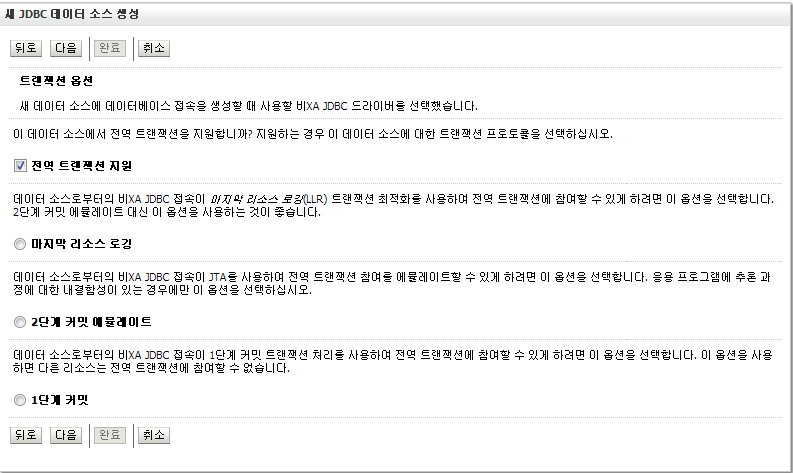
Set the "Transaction Options". If there is nothing special to set, go to the next step.
-
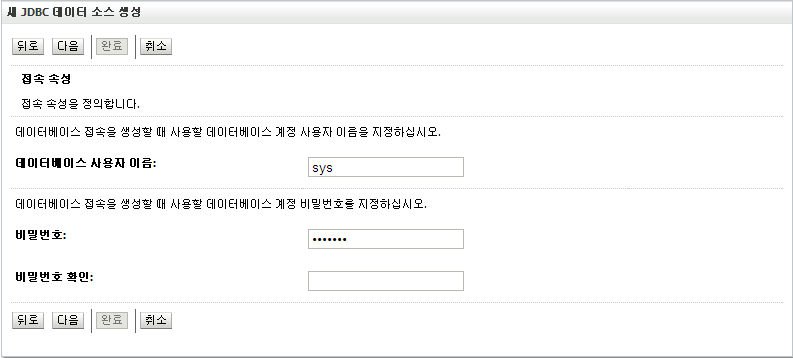
Enter Altibase information to be linked. (sys/manager)
-
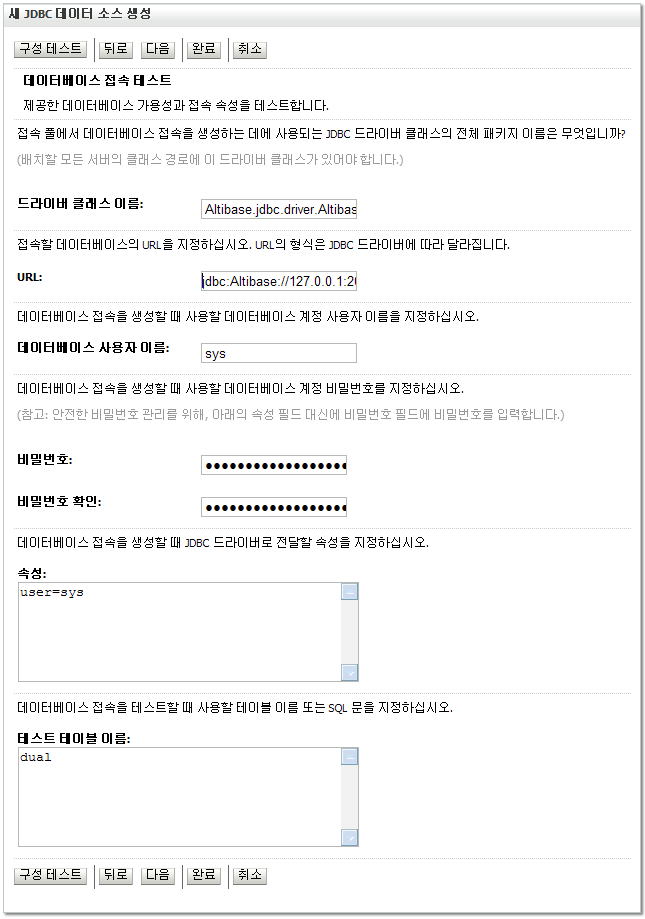
Enter the JDBC information related to the connection pool for Altibase connection.
-
Driver class name When using Altibase.jar, Altibase.jdbc.driver.AltibaseDriver
When using Altibase#.jar, Altibase#.jdbc.driver.AltibaseDriver
-
URL
Enter the connection URL based on the information of ALTIBASE entered in the previous step.
jdbc:Altibase://127.0.0.1:20300/mydb -
Property In the case of Altibase 4, the user to access in “user = sys” format must be entered. In the case of Altibase 5 and Altibase 6, it can be omitted.
-
Test Table
Generally, a dummy table, dual, is specified.
-
-
Click [DOCKI: Configuration Test] to proceed to the next step if the connection test is successful. If the test fails, refer to the Integration Error section first.

-
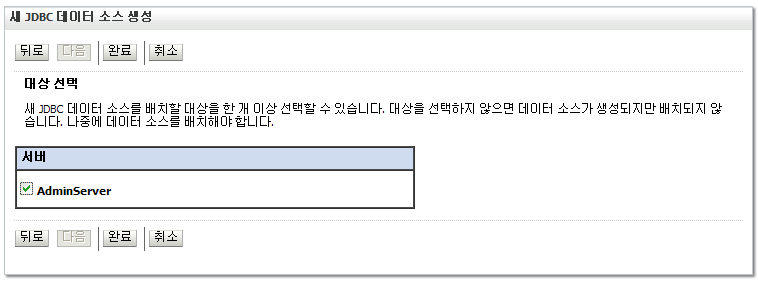
Select the management server as the server on which to deploy the JDBC data source, and then select [DOCKI: Done].
-
Confirm that the JDBC data source has been successfully added.
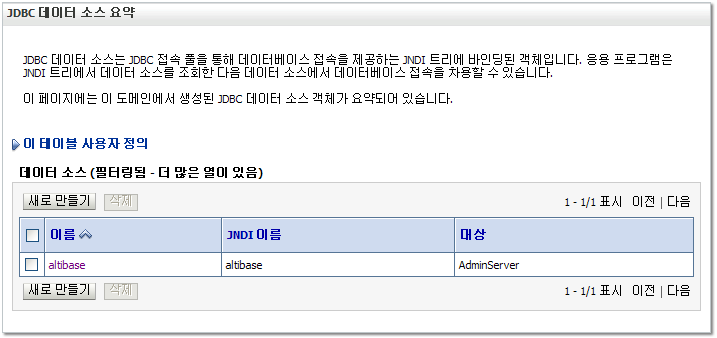
Change Connection Pool Settings#
When the user creates a JDBC data source, related connection pools are also created. The connection pool has various properties. If necessary, refer to the following procedure to change the settings.
Changing the attributes presented as examples is not mandatory, but is recommended.
-
On the management console main screen, select the “Data Sources” item, select the JDBC data source you want to change, and then select the [DOCKI: Connection Pool] tab of the [DOCKI: Configuration] tab.

-
Change the following properties as appropriate and select [DOCKI: Save].
- Initial Capacity
The default number of connection pools is 1, but a larger number is recommended considering the workload.
- Initial Capacity
Check#
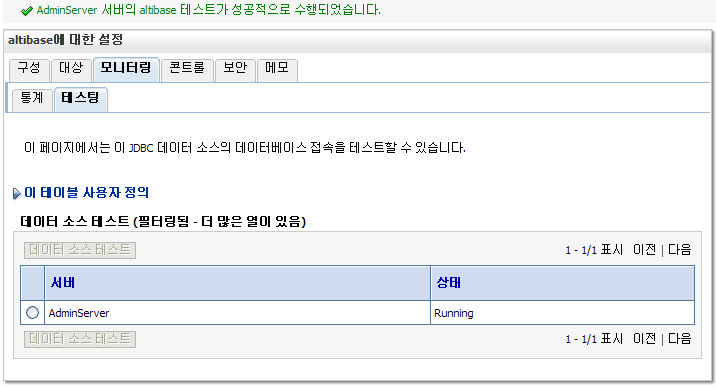
Check whether the JDBC data source creation was successful.
- Check in WebLogic
Select the "Data Source" item on the main screen of management console, click the JDBC data source the user wants to check, and check the connection success on the [DOCKI: Testing] tab of the [DOCKI: Monitoring] tab.
- Check in Altibase
Perform a session-related query in Altibase, which is the connection target of the JDBC data source, and check whether the session exists as much as the initial capacity of the established connection pool.
Below is the execution result when the initial capacity is set to 10. The user can see that there are 10 JDBC type sessions.
iSQL> isql -s 127.0.0.1 -u sys -p manager -port 20300
-----------------------------------------------------------------
     Altibase Client Query utility.
     Release Version 5.3.3.12
     Copyright 2000, ALTIBASE Corporation or its subsidiaries.
     All Rights Reserved.
-----------------------------------------------------------------
ISQL_CONNECTION = TCP, SERVER = 127.0.0.1, PORT_NO = 20300
iSQL> set linesize 200
iSQL> set colsize 20
iSQL> select comm_name, client_type,
   2   db_username, id session_id from v$session;
COMM_NAME             CLIENT_TYPE   DB_USERNAME   SESSION_ID
--------------------------------------------------------------
TCP 127.0.0.1:11274   JDBC          SYS           60
TCP 127.0.0.1:8710    JDBC          SYS           63
TCP 127.0.0.1:12294   JDBC          SYS           64
TCP 127.0.0.1:13318   JDBC          SYS           65
TCP 127.0.0.1:18694   JDBC          SYS           66
TCP 127.0.0.1:19462   JDBC          SYS           67
TCP 127.0.0.1:5126    JDBC          SYS           61
TCP 127.0.0.1:19974   JDBC          SYS           68
TCP 127.0.0.1:20486   JDBC          SYS           69
TCP 127.0.0.1:21254   JDBC          SYS           70
TCP 127.0.0.1:34311   CLI-32LE      SYS           72
11 rows selected.
Creating and Deploying Web Application#
This is an example of creating and deploying a simple web application for integration.
Creating Web Application#
Create a web application named sample and the default page welcome.html.
-
After creating a directory with the name of the web application, create "WEB-INF" as a sub-directory.

-
Create a web.xml file with the following contents in the WEB-INF directory.
<?xml version="1.0" encoding="UTF-8"?>
<!DOCTYPE web-app PUBLIC "-//Sun Microsystems, Inc.//DTD Web Application 2.3//EN" "http://java.sun.com/dtd/web-app_2_3.dtd">
<web-app>
  <welcome-file-list>
     <welcome-file>welcome.html</welcome-file>
  </welcome-file-list>
</web-app>
Arrangement#
The user can manually deploy through the deployment menu provided in the management console, but for convenience, use automatic deployment through $DOMAIN_HOME/autodeploy provided when installed in development mode.
-
Place the entire web application directory created under $DOMAIN_HOME/autodeploy.
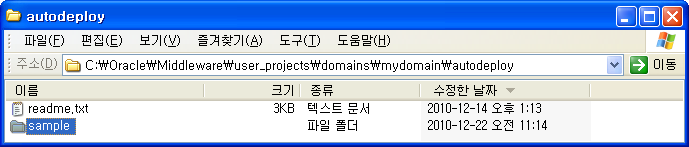
-
Select the "Deployment" menu on the left side of the main page of the management console to check the automatic placement.
Check#
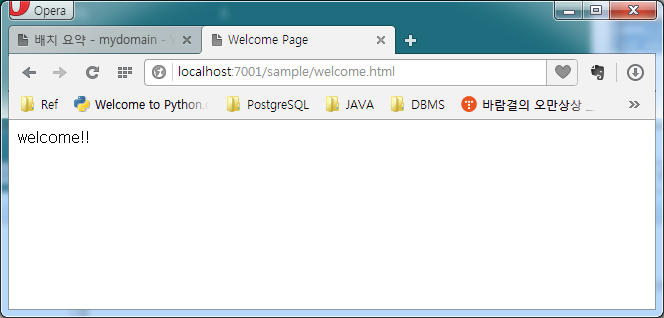
The example of the basic page of the web application confirms the success of the deployment.
-
Create welcome.html in the sample directory with the following content.
<head><title>Welcome Page</title></head> <body>welcome!!</body> </html> -
Access the created page and check the output.
Integration Example#
By executing the example of connecting to Altibase through JNDI of the JDBC data source, it is checked whether the connection with Altibase was successful.
Altibase Integration#
Create a web application program that works with Altibase to check the connection information.
-
Create singleVersion.jsp in the sample directory with the following contents.
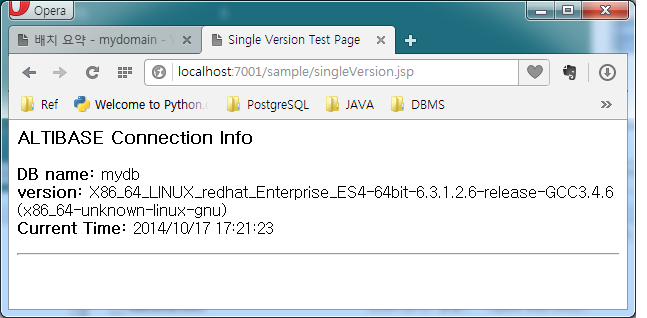
<%@ page contentType="text/html;charset=euc-kr" pageEncoding="euc-kr"%> <%@ page import="java.sql.*, javax.naming.*, javax.sql.*"%> <head><title>Single Version Test Page</title></head> <body> <% Context initCtx = new InitialContext(); DataSource ds = (DataSource)initCtx.lookup("altibase"); Connection sCon = ds.getConnection(); Statement sStmt = sCon.createStatement(); String query = "select '" + "<b>DB name: </b>'||trim(db_name)||'<br>" + "<b>version: </b>'||trim(product_signature)||'<br>" + "<b>Current Time: </b>'"+ "||to_char(sysdate,'yyyy/mm/dd hh24:mi:ss')||'<hr>'" + " from v$database;"; ResultSet sRes = sStmt.executeQuery(query); sRes.next(); out.println("<font size=4><b>ALTIBASE Connection Info</b></font><p>"); out.println(sRes.getString(1)); sRes.close(); sStmt.close(); sCon.close(); %> </body> </html> -
Access to the created page and check whether the information of the integrating target Altibase is displayed with error.
Integrating Different Versions of Altibase#
Create a web application program that works with Altibase and Altibase 5 at the same time to check the connection information.
-
Refer to How to set the JDBC Driver to be used in WebLogic and set the JDBC driver files for Altibase 5, and Altibase 6 in advance to be used in WebLogic.
(Altibase JDBC provides a JDBC driver with a different name in the package for that version. It is prepared for easy use by copying from a higher version or lower version. In other words, to use Altibase 5 and 6 versions simultaneously, the user can get the name changed version and use it.)
- The two drivers provided in the HDB package are the same driver with different names.
HDB Version Altibase 5 Altibase 6 Altibase 7 Current Package Version Altibase.jar Altibase.jar Altibase.jar For Compatibility Name Change Version Altibase5.jar Altibase6.jar Altibase7.jar -
Create a JDBC data source for each. (JNDI makes it the same as the JDBC data source name.)
-
JDBC data source altibase for Altibase using Altibase.jar (Driver class name: Altibase.jdbc.driver.AltibaseDriver)
-
JDBC data source altibase5 for Altibase 5 using Altibase5.jar (Driver class name: Altibase5.jdbc.driver.AltibaseDriver)

-
-
In the sample directory, create multiVersion.jsp with the following content.
<%@ page contentType="text/html;charset=euc-kr" pageEncoding="euc-kr"%> <%@ page import="java.sql.*, javax.naming.*, javax.sql.*"%> <head><title>Multi Version Test Page</title></head> <% Context initCtx = new InitialContext(); DataSource ds1 = (DataSource)initCtx.lookup("altibase5"); DataSource ds2 = (DataSource)initCtx.lookup("altibase6"); Connection sCon1 = ds1.getConnection(); Connection sCon2 = ds2.getConnection(); Statement sStmt1 = sCon1.createStatement(); Statement sStmt2 = sCon2.createStatement(); String query = "select '" + "DB name: '||trim(db_name)||'" + "version: '||trim(product_signature)||'" + "Current Time: '"+ "||to_char(sysdate,'yyyy/mm/dd hh24:mi:ss')||''" + " from v$database;"; ResultSet sRes1 = sStmt1.executeQuery(query); ResultSet sRes2 = sStmt2.executeQuery(query); sRes1.next(); sRes2.next(); out.println("First Altibase Connection Info."); out.println(""+sRes1.getString(1)); out.println("Second Altibase Connection Info."); out.println(""+sRes2.getString(1)); sRes1.close(); sRes2.close(); sStmt1.close(); sStmt2.close(); sCon1.close(); sCon2.close(); %> </body> </html> -
Access to the created page and check whether the information of the integrating target Altibase is displayed without error.

Fail-Over & Load-Balancing Settings#
This chapter describes how to set up Fail-Over and Load-Balancing in WebLogic or Altibase.
Setting in WebLogic#
While creating multiple JDBC data sources, the user can set up either Fail-Over or Load-Balancing as an algorithm. For the setting method and details refer to the related document.
Fail-Over#
Proceed by sending the connection request to the first JDBC data source in the multiple JDBC data source list and, if the request fails, to the next JDBC data source. This process continues until a suitable connection is obtained or the end of the list is reached, and an exception is raised if the connection is not obtained until the end of the list.
Load-Balancing#
This evenly distributes connection requests to data sources in multiple JDBC data source lists. This algorithm basically provides a Fail-Over algorithm.
Setting in Altibase#
For setting method and details, please refer to "Replication for Altibase Manual" and "JDBC for Altibase Manual".
Integration Error#
Cannot load driver#
This occurs when attempting to connect without the JDBC driver set up normally.
Please refer to How to set the JDBC Driver to be used in WebLogic.
Can not make a database connection to the given URL / Invalid Altibase URL (No suitable driver)#
If there is an error in the connection URL as below, an error occurs.
- Incorrect format, typing error
-
When JDBC item is set to a name other than "Altibase" (In this case, no suitable driver may occur depending on the version.)
jdbc:otherDBMS://127.0.0.1:20300/mydb
Could not create pool connection#
This occurs when there is an error in the connection pool configuration when creating a JDBC data source. There are various cases, but typical cases are as follows.
- When the connection target is Altibase 4, the user to access in the form of "user=sys" must be entered in the property.
Client unable to establish connection / Communication link failure#
In the following cases, a client unable to establish a connection error occurs. (Communication link failure may occur depending on the version.)
- Altibase server is not running
- If the connection is impossible because the IP address or port number of the Altibase server is incorrectly set in the connection URL
The following is an example of the case where the IP address of the Altibase server to be integrated is 192.168.1.81 and the port number is 20300, and it is incorrectly specified as a different value.
jdbc:Altibase://192.168.1.80:20800/mydb
Hang phenomenon#
If the user tries to connect while the Altibase JDBC driver and the CM protocol version of the Altibase server are different, a phenomenon such as hang may occur depending on the WebLogic version.
When this happens, most of the WebLogic server instances have to be restarted, so caution is required in advance.
For related information, refer to How to Check the Altibase JDBC Driver Version.
WebLogic Glossary#
Before integrating Altibase and Weblogic, this chapter briefly explains WebLogic and related terms.
Domain#
A domain is a logical grouping of WebLogic server instances. A domain consists of one or more WebLogic Server instances.
The user can configure multiple domains by installing one WebLogic (WebLogic Server/WLS) or multiple domains by installing multiple WebLogic.

WebLogic Server Instance (Administration Server, Managed Server)#
WebLogic server instance is a process that can deploy web application, web service, EJB, etc.
It is divided into "Administration Server" and "Managed Server".

-
Administration Server
To manage the entire domain, the WebLogic server instance with the Administration Console deployed together is created when the domain is created.
-
Managed Server
All WebLogic Server instances except the administration server can be added separately or clustered between instances.
That is, one domain consists of one management server and zero or more managed servers.
JDBC Data Source#
A JDBC data source is the Java object for a WebLogic server instance to connect to the RDBMS.
When creating a JDBC data source for the RDBMS to be integrated, and specifying the WebLogic server instance to use the JDBC data source, the web application deployed in the WebLogic server instance works with the target RDBMS by specifying the JNDI name of the JDBC data source in the source code.
In order to create a JDBC data source, the relevant JDBC driver must be set in advance so that it can be used in WebLogic.
Connection Pool#
Connection set with RDBMS, which is automatically created when creating a JDBC data source, is adjusted by various properties such as "Initial Capacity" and "Maximum Capacity".
Deployment & Distribution#
Both deployment and distribution are synonymous for deploy and are unified as "deployment" in this document.